- Home
- Shop
- Services
-
Technical
- ECU Identification
- Technical Support
- Hondata Flashpro FK8 Launch Control
- Hondata Flashpro FK8 Traction Control
- How To Correctly Measure Main Bearings
- Line Boring and Main Journals
- Cylinder Head Information - Part 1
- Cylinder Head Information - Part 2
- K24 Test Engine
- K24 Test Engine Part 2
- K24 Test Engine Part 3
- K24 Test Engine Part 4
- K24 Test Engine Part 5
- K24 Test Engine More Midrange Power
- Jackson Racing Supercharger DC5 RSX Diagrams
- Media
- Contact
- Workshop Equipment For Sale
Customer login
How To Correctly Measure Main Bearings
How To Correctly Size Main Bearings
In almost all modern engines, the crankshaft floats on a hydrodynamic film of oil between the crankshaft’s main journal and a pair of bearing shells mounted in the engine block.
Correctly sizing the main bearing shells is critical to achieve the required oil clearance, and thus to ensure reliability of the engine.
Before taking any measurements, note that all sizes and clearances stated by engine manufacturers and bearing manufacturers will be provided to an internationally recognised standard (ISO 1*) and all measurements are taken in stable temperature conditions of 20 deg Celcius. Given the level of accuracy required it is strongly recommended that all measurements taken by any engine builder are also measured under these conditions.
The following is the correct procedure to measure the oil clearance and ensure that it is correct: -
1) Obtain the correct tools as follows:
- High quality two point bore gauge (0.001mm increments)
- 0-25mm ball type micrometer (0.001mm increments)
- Standard micrometer (0.001mm increments, correct range for you main journal size)
- Accurate torque wrench
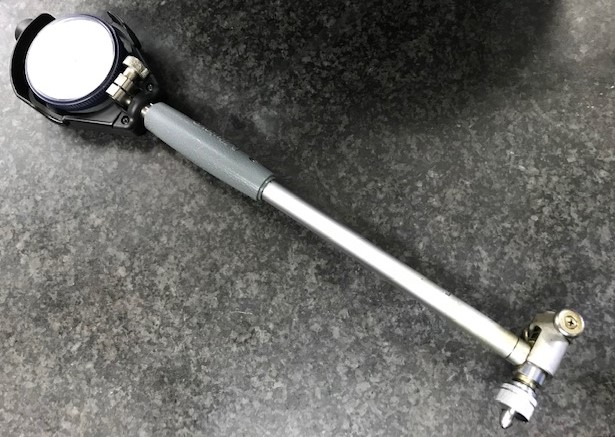
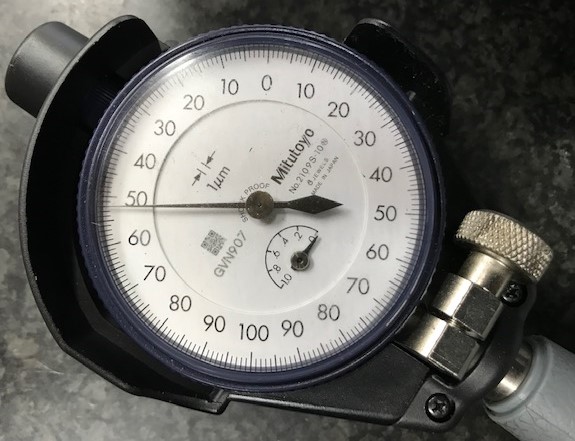
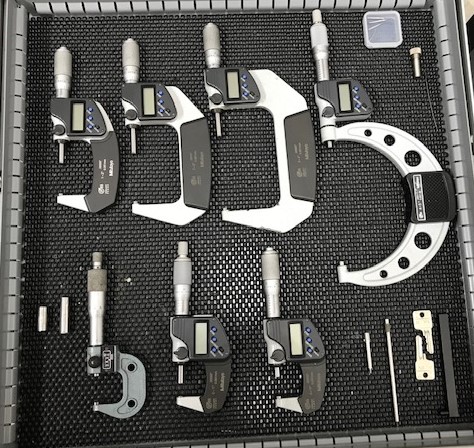
2) Accurately calibrate your bore guage using either a micrometer or setting ring. This is critical, do not skip this step.
3) Thoroughly clean and dry the crankshaft, block and any fixings.
4) Accurately measure the main journal diameters in the block. To do this fit the main caps or girdle to their correct positions on the block, and torque the fasteners to the manufacturers’ specification (NB. if using ARP fasteners, torque to ARP’s specification). Next accurately measure the diameter of each journal. Do this in three locations around the journals diameter and record the measurements. NOTE - they are not always round!
5) Now check the diameters of the journals with the engine manufacturers’ and/or the bearing manufacturers’ specification. An example of this is the Honda K series which has a lower limit of 59.000mm and an upper limit of 59.020mm, if the journals are not precisely within the specification, then rectification work in the form of line boring is required before proceeding, you can find more information on line boring here
https://www.cplracing.co.uk/line-boring-and-main-journals
6) If your journals are within specification or you have had your block line bored the next step is to measure the crankshaft journals. Measure each journal in three places around the journal and record your measurement.
7) Once you have completed the above, take the diameter of No. 1 main journal in the block and subtract the diameter of No. 1 main journal from the crankshaft then subtract the oil clearance that you require, divide the result by 2, this will be the thickness of the bearings that you require.
8) Repeat the procedure for the other four journals.
*ISO 1 is an international standard set by the International Organization for Standardization that specifies the standard reference temperature for geometrical product specification and verification. The temperature is fixed at 20 °C, which is equal to 293.15 kelvin and 68 degrees Fahrenheit.
Share this page
Why shop with us?
Value For Money
Worldwide Delivery
Secure On-Line Payments
Browse our expanding range of premium quality CPL Racing products
Terms and Conditions of Trade
Privacy Policy
Returns Policy
© 2026. CPL Racing
CPL Racing is a trading name of Chamberlain Precision Limited
Registration number 4219332
Site By 321-Designs


